Deck System Install
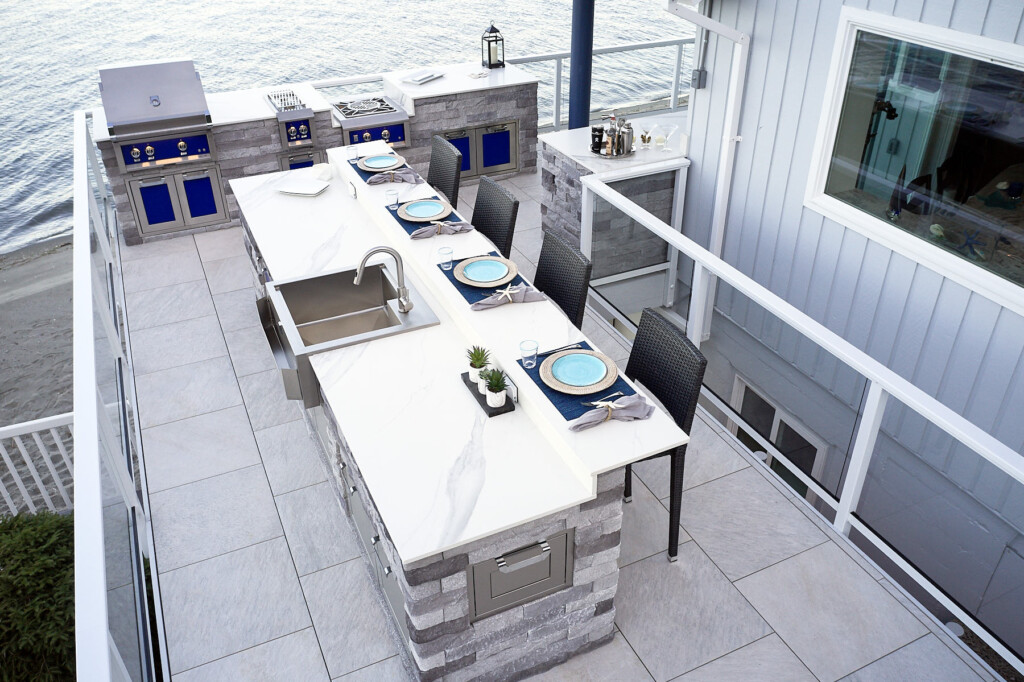
Mbrico deck systems are not installed like traditional decking or surface-level paver applications.
Built on a patented tongue-and-groove track system, each tile locks into place for precise alignment, structural stability, and consistent spacing without clips or guesswork.
Joist Framed Install Summary Sheet
Joist Framed Install Tutorial Video
Engineered Installation. Not Traditional Decking.
Mbrico deck systems are not installed like composite decking, wood planks, or surface-level tile applications.
Built on a patented tongue-and-groove track system, each reinforced porcelain paver mechanically locks into place, creating a structurally aligned, self-spacing, and free-draining surface without clips, adhesives, or grout.
The result is a faster, cleaner, and more precise installation process designed for long-term performance.
What Makes Mbrico Installation Different
Deck Framing and Structure
Ensure your deck framing meets or exceeds all local and national codes, including proper footings, structural attachment, and material quality.
Proper flashing and compatibility with surrounding materials are critical to ensuring long-term substructure performance.
Layout and Installation
Plan your layout in advance to minimize cuts and position partial tiles in less visible areas.
Installation follows a similar planning approach to interior tile, requiring coordination around stairs, edges, and penetrations such as railings.
Deck Height and Weight
The Mbrico system adds 1-5/8″ to deck height and 10.5 lbs per square foot to the structure.
Pre-existing framing built to code does not need enhancement. Ensure framing is designed accordingly.
Easy Installation
Mbrico systems are designed for skilled carpentry crews, deckbuilders, and landscapers using standard tools.
The tongue-and-groove track system simplifies alignment and placement, reducing guesswork while delivering a consistent, high-quality finished surface.
Once installed, the system requires no maintenance and eliminates the ongoing refinishing associated with wood, composite, or PVC decking.
Design Goals
Mbrico was engineered with two priorities:
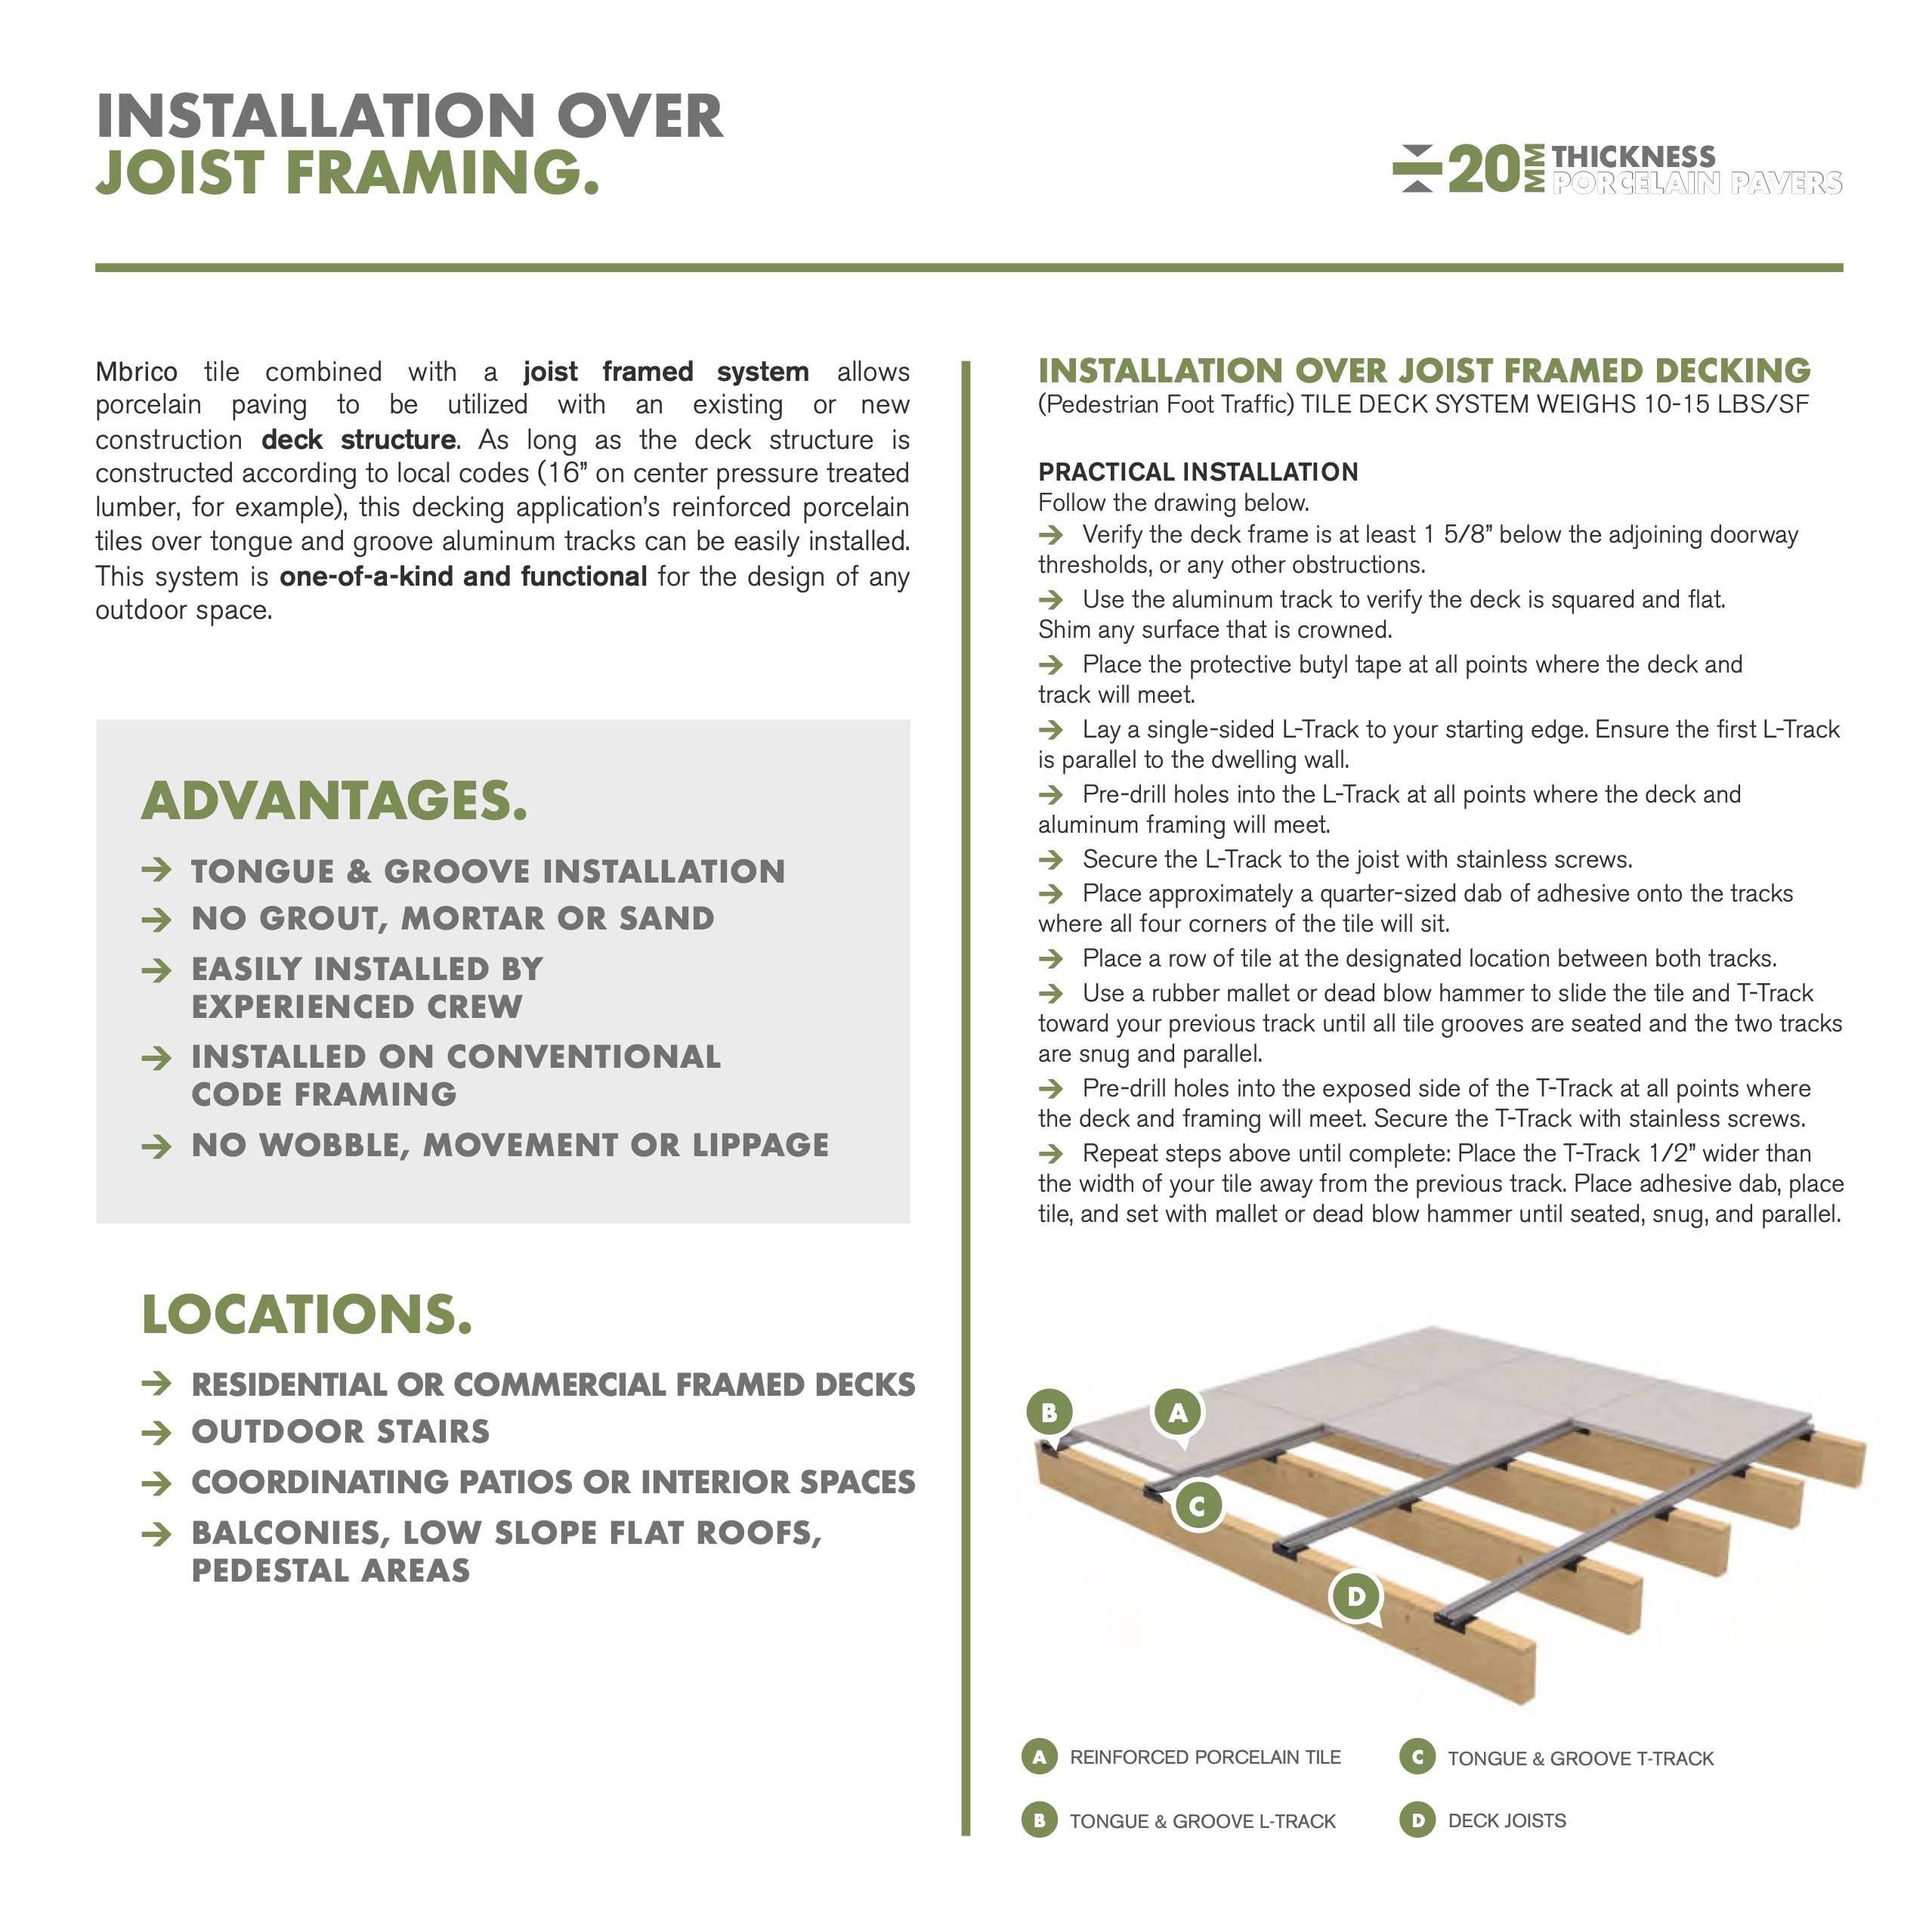
Verify the standard code deck frame is at least 1-5/8” below the adjoining doorway thresholds, or any other clearance obstructions. (Contact salesperson for alternatives)
Using an Mbrico track, verify the deck is squared and flat. Any individual joist or surfaces that is crowned upwards or crowned downwards need to be flattened or shimmed to level the track. Note: Verify the handrail, trim, and plans before starting. See “Details” page for common option(s).
Place the provided protective butyl tape at all points where the aluminum track will contact your deck framing.
Place a single sided L-Track per your layout at your designated starting edge. It is crucial that this first track is parallel to the dwelling wall.
Using a ¼” drill bit, pre-drill holes only to the aluminum L-Track on the outer bank at all points where the track intersects the deck joist. Do not pre-drill the joists.
Secure L-Track to the joist with the provided stainless screws. There will be one screw for each intersection of track and joist.
Place your T-Track ½” wider than the width of your tile away from your previous track. Ensure the track is sitting level and the protective butyl flashing tape is placed beneath.
Place a dab of the provided adhesive onto the track where all four corners of the tile will sit on track. The adhesive dab should be approximately the size of a quarter.
Place a row of Mbrico tiles at the designated location in between both tracks. The grooved/kerfed edge of your tile will fit securely into the tongue of the Mbrico tracks.
Using a rubber mallet or dead blow hammer, slide the tile and T-Track toward your previous track until all tile grooves are fully seated and your two tracks are snug and parallel.
Using a ¼” drill bit, pre-drill holes in the aluminum T-Track on the exposed side of the track at all points where the track intersects the deck joists. Do not pre-drill the joists.
Secure the T-Track to the joist with the provided stainless screws. There will be one screw for each intersection of track and joist.
Repeat steps 7 through 12 until you reach the last row.
Place the provided protective butyl tape at all points where the aluminum track will contact your deck framing, including your ledger board.
Cut the final L-Track ½” shorter than the length of 2-3 tiles and place the track on the designated location.
Pre-drill and secure the L-Track segment to your deck frame using the provided stainless screws.
Place a dab of provided adhesive onto the track where all four corners of tile will sit on the tracks. Note: Process will be to apply four dabs of adhesive and slide the tile in.
Slide the Mbrico tile from track end into the designated location. Repeat these two steps to complete this segment of tracks.
Repeat steps 15 through 18 until all tiles are placed.
The following two steps are only to be completed if any structure or object is obstructing your pathway to slide the tile from ends. If no structure or object is obstructing, you may repeat previous steps until completion of the tile layout. Cut the bottom lip of the last tile with a porcelain blade.
After applying adhesive on all four corners, slide the tile’s groove into your previous track’s tounge and gently place down the tile to rest on final L-Track.